
On Kos, the morning starts before the sun is fully up. The bakeries open early — the good ones before seven — and by the time you arrive, the tiropitakia are already lined up behind the glass, wrapped loosely in paper, still warm from the oven. As a child, I would stop there on the way to school with whatever coins were in my pocket. One bite and the filo would shatter, flakes drifting down, and the filling — salty, rich, just set — would practically melt against the warmth of the pastry.
That is the benchmark for tiropita Greek cheese pie, at least for me. Not a recipe from a book, but a sensory memory: the crackle, the warmth, the salt of real feta. Everything I have worked out in the years since has been an attempt to recreate that bakery standard at home.
Tiropita is simpler than its cousin spanakopita — no greens to wilt and press, no herbs to chop. Just filo, butter, feta, and eggs. But that simplicity means every decision counts. The feta you choose matters. The egg ratio matters. The way you handle the filo matters. In this post, I will walk you through all of it.
Why This Recipe Works
- Block feta in brine, not pre-crumbled. Pre-crumbled feta is drier and often less flavorful. Block feta, packed in its own brine, has the moisture and sharpness that the filling needs. According to the PDO specifications for Greek feta, authentic feta is made from sheep’s milk (with up to 30% goat’s milk) and aged in brine — that process is what gives it the character that pre-crumbled versions lack.
- The egg ratio is the difference between a filling that holds and one that rusts. Too few eggs and the filling crumbles when you cut it. Too many and it becomes rubbery, more like a quiche than a Greek pie. Three large eggs to 400g of feta gives you a filling that is creamy, just set, and sliceable.
- Butter between the filo layers for flavor, olive oil as a traditional alternative. I use melted butter — it gives the filo a richer flavor and a deeper golden color. That said, olive oil is the traditional fasting-table version and works very well if you prefer it or need the recipe to be dairy-light.
- Score the top before baking. This is not optional. Scoring the top layers of filo allows steam to escape and prevents the layers from buckling and separating unevenly. It also makes the pie far easier to portion once it comes out of the oven.
- Filo is more forgiving than people think. Tears are fine. Overlapping pieces work. The only thing that will genuinely ruin filo is letting it dry out — keep it covered with a lightly damp kitchen towel while you work, and move at a reasonable pace.
Step-by-Step Instructions
1. Thaw the filo properly. Take the filo out of the freezer and refrigerate it overnight. Rushing this step — counter-thawing — leads to condensation inside the package and sticky, torn sheets. When you are ready to work, unroll the filo onto a clean surface and lay a slightly damp kitchen towel over the top immediately.
2. Preheat and prep the pan. Preheat your oven to 190°C (375°F). Grease a 33x23cm (13×9-inch) baking pan generously with butter or olive oil.
3. Make the filling. Crumble the feta into a large bowl — leave some texture, you want pieces not a paste. Add the eggs, milk, and black pepper. If using ricotta or anthotiro, add it here. Mix until combined. Don’t oversalt — feta is already quite salty; taste first, adjust after.
4. Layer the base — 6 to 7 sheets. Lay one sheet of filo into the pan, letting it drape over the edges. Brush it thoroughly but lightly with melted butter. Repeat with 5 to 6 more sheets, buttering each one. You want roughly half your filo sheets on the bottom.
5. Add the filling. Pour the feta mixture evenly over the base layers and spread it gently with a spatula.
6. Layer the top — remaining sheets. Layer the remaining filo sheets over the filling, buttering each one as before. Fold any overhanging edges back over the top to seal the sides. Brush the top generously.
7. Score and bake. Using a sharp knife, score the top layers of filo — cut through about halfway down, into diamonds or squares. Do not cut all the way through to the filling; you are just releasing steam and marking portions. Sprinkle a few drops of water over the top (this helps the layers separate beautifully). Bake for 40–45 minutes, until deeply golden and crackling.
8. Rest before cutting. Let the tiropita rest for 10–15 minutes before cutting all the way through. This allows the filling to firm up and the filo to retain its shatter rather than collapsing from the heat.
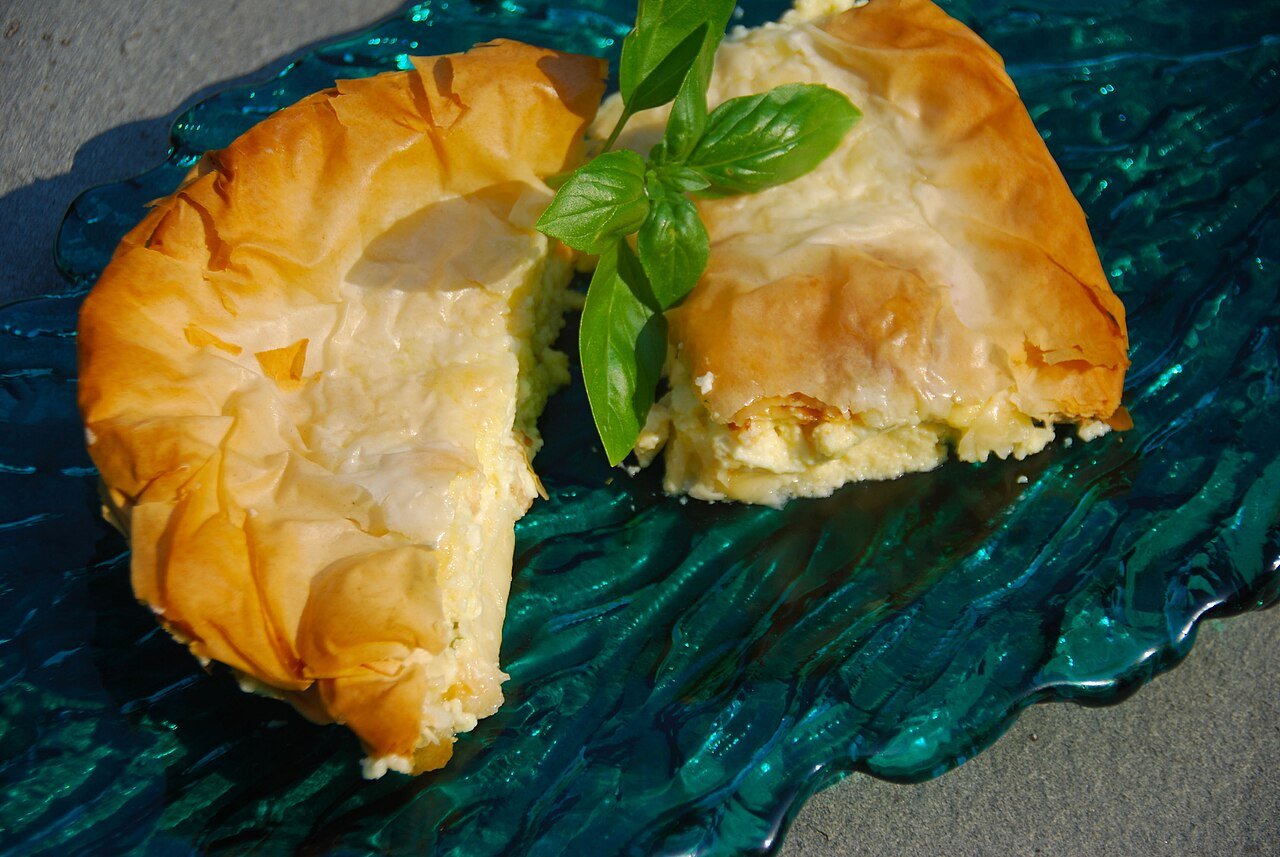
Tiropita (Greek Cheese Pie)
Ingredients
For the filling
- 400 g (14 oz) block feta cheese, crumbled
- 3 large eggs
- 60 ml (1/4 cup) whole milk
- freshly ground black pepper to taste
- 2-3 tablespoons ricotta or anthotiro optional, for extra creaminess
For the filo layers
- 270 g (9.5 oz) filo pastry (12-14 sheets) thawed overnight in the refrigerator
- 120 g (1/2 cup) unsalted butter, melted or 80 ml (1/3 cup) good olive oil
- extra butter or olive oil for the pan
Instructions
- Take the filo out of the freezer and refrigerate it overnight. Rushing this step - counter-thawing - leads to condensation inside the package and sticky, torn sheets. When you are ready to work, unroll the filo onto a clean surface and lay a slightly damp kitchen towel over the top immediately.
- Preheat your oven to 190C (375F). Grease a 33x23 cm (13x9-inch) baking pan generously with butter or olive oil.
- Crumble the feta into a large bowl - leave some texture, you want pieces not a paste. Add the eggs, milk, and black pepper. If using ricotta or anthotiro, add it here. Mix until combined. Do not oversalt - feta is already quite salty; taste first, adjust after.
- Lay one sheet of filo into the pan, letting it drape over the edges. Brush it thoroughly but lightly with melted butter. Repeat with 5 to 6 more sheets, buttering each one. You want roughly half your filo sheets on the bottom.
- Pour the feta mixture evenly over the base layers and spread it gently with a spatula.
- Layer the remaining filo sheets over the filling, buttering each one as before. Fold any overhanging edges back over the top to seal the sides. Brush the top generously.
- Using a sharp knife, score the top layers of filo - cut through about halfway down, into diamonds or squares. Do not cut all the way through to the filling; you are just releasing steam and marking portions. Sprinkle a few drops of water over the top. Bake for 40-45 minutes, until deeply golden and crackling.
- Let the tiropita rest for 10-15 minutes before cutting all the way through. This allows the filling to firm up and the filo to retain its shatter rather than collapsing from the heat.
Notes
Nutrition
Chef’s Notes
On feta: If you have access to a good Greek deli or specialty shop, ask for barrel-aged feta — it is sharper and more complex than standard block feta. It transforms the filling. For an introduction to how feta differs from other white cheeses and what PDO status means in practice, the Oldways Cheese Coalition has useful background on traditional cheesemaking and why origin matters.
On filo tears: I have seen professional pastry chefs treat filo like it is made of tissue paper. It is not. If a sheet tears, overlap it with a piece from another sheet and keep going. The butter binds everything together and the layers mask any imperfection. What you cannot fix is dried-out filo, which turns brittle and cracks at the fold. Keep it covered.
Pairing suggestions: Tiropita is at home in a broader mezedes spread — serve it alongside my Tzatziki and a crisp Horiatiki (Greek Village Salad) for a meal that needs nothing else. It also pairs beautifully alongside my Spanakopita (Greek Spinach Pie) — the two pites together make a proper table.
Storage: Refrigerate covered for up to 3 days. Reheat in a 180°C (350°F) oven for 10 minutes — the microwave will make the filo limp, and that is a shame. Tiropita can be frozen before or after baking. If freezing unbaked, freeze in the pan, then bake directly from frozen, adding 15–20 minutes to the bake time.
Make it your own: A handful of fresh mint in the filling is a lovely variation. Some cooks add a pinch of nutmeg. In certain parts of Greece, a small amount of graviera or kefalotiri is mixed in with the feta for extra depth. All of these are valid. The baseline recipe is a platform, not a fixed rule.
FAQ
What is tiropita?
Tiropita (τυρόπιτα) is a traditional Greek cheese pie made with layers of filo pastry and a filling of feta cheese and eggs. The word comes from tyri (cheese) and pita (pie). It is one of the most common savory pies in Greek cuisine and appears in bakeries, homes, and tavernas throughout Greece and the Greek diaspora.
What is the difference between tiropita and spanakopita?
The primary difference is the filling. Spanakopita includes spinach (and sometimes herbs like dill or mint) alongside the feta and egg mixture, while tiropita is cheese only. Both use filo pastry and follow the same layering technique. Tiropita tends to have a richer, saltier bite; spanakopita is earthier and slightly lighter.
How do you keep filo from drying out?
The moment filo is exposed to air, it begins to dry. Keep the unused sheets covered with a lightly damp kitchen towel at all times while you work. “Lightly damp” means the towel should not be wet — a wet towel will make the filo stick. Work at a steady pace and do not leave the filo uncovered while you pause to do something else.
Can I use ricotta instead of feta in tiropita?
Ricotta alone will not give you the same result — it lacks the saltiness and acidity of feta. However, mixing a few tablespoons of ricotta or the Greek soft cheese anthotiro into the filling alongside feta adds creaminess without losing the character of the dish. I sometimes do this when I want a slightly softer, milder filling. Using only ricotta gives you a different pie entirely — closer to an Italian torta di ricotta than a tiropita.
Can tiropita be made ahead and frozen?
Yes. Tiropita freezes well, both baked and unbaked. For best results, assemble the pie but do not bake it, then freeze it directly in the pan, tightly wrapped. When ready to eat, bake directly from frozen at 190°C (375°F) and add 15–20 extra minutes to the bake time. If freezing after baking, allow it to cool completely before wrapping. Reheat from frozen in the oven — the filo will regain much of its crispness.